replace the ink
cartridges
Front-panel display messages appear under the following conditions to let
you know that you should replace your ink cartridges.
•
Low ink levels
•
Ink cartridges are approaching their expiration dates
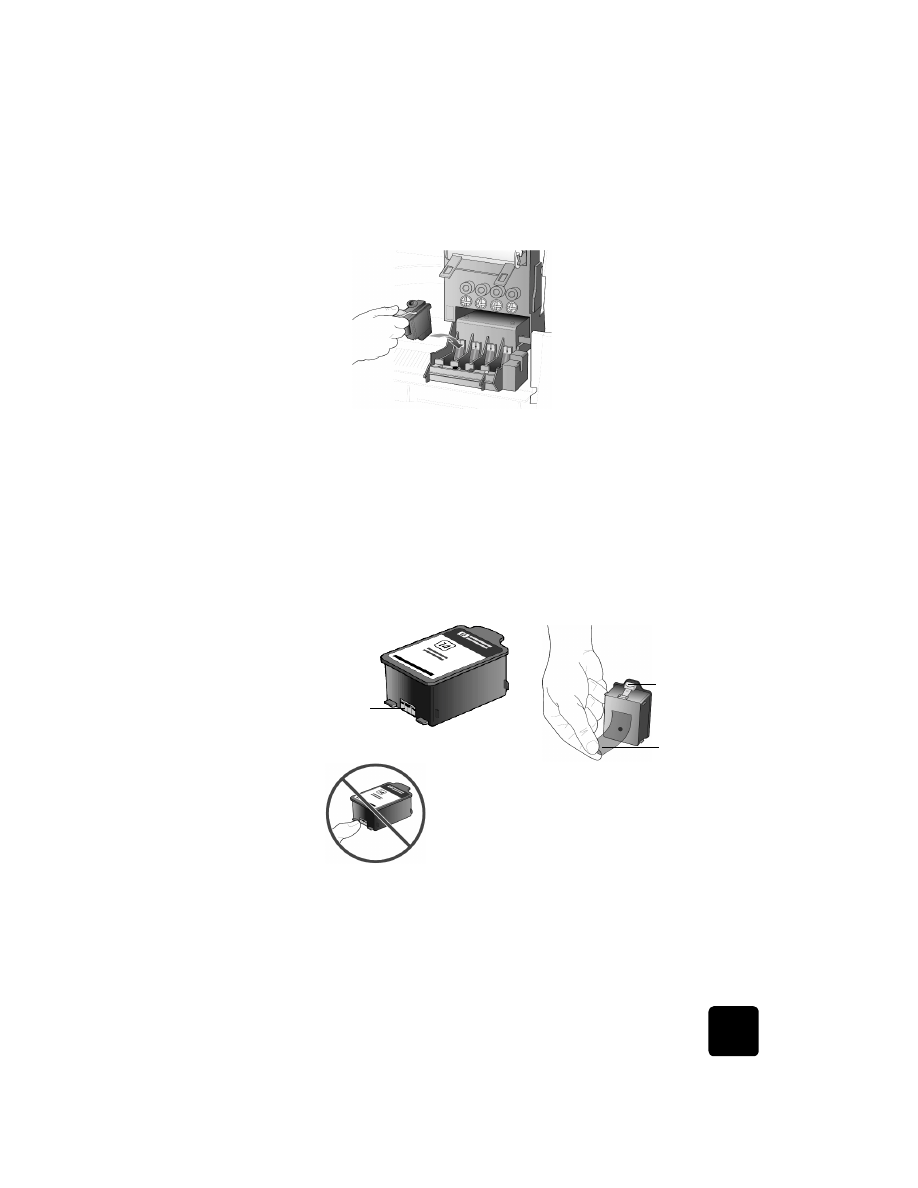
Copper
contacts
Release button
Plastic tape
Do not touch the copper contacts, and hold the
cartridge away from you as you remove the plastic
tape so the ink does not spill on you or your clothing.

maintain your hp officejet
64
hp officejet d series
Caution! If you ignore the messages and do not replace the
ink cartridges, eventually the HP OfficeJet will stop working
completely to avoid damaging the printheads.
See the Support and Specifications booklet for information on ordering
replacement ink cartridges.
1
Turn on the unit, then open the print-carriage access door by lifting the
handle until the door locks into place.
The print carriage moves to the center of the unit.
2
After the carriage stops moving, press the gray button to release the
ink cartridge, then pull it up and out of its slot.
Caution! To avoid damaging the printer, remove an ink
cartridge only when a replacement is available. If an ink
cartridge is removed without being replaced:
–
Close the print carriage and the print-carriage access door.
–
Replace the ink cartridge within 24 hours.
–
Never remove an ink cartridge and a printhead at the same time.
3
Remove the new ink cartridge from its packaging and, being careful to
touch only the black plastic, gently remove the plastic tape.

work with printheads and ink cartridges
65
hp officejet d series
Caution! Hold the cartridge away from you as you remove
the plastic tape so the ink does not spill on you or your
clothing.
Caution! Do not touch the copper contacts.
4
Push the new ink cartridge firmly down into the appropriate slot until it
clicks into place.
Note the color bars on the print carriage.
The ink-cartridge label should be face-up after the cartridge is
inserted.
place the ink cartridges into their respective slots on the left and right
5
Close the print-carriage access door.